Expense Refunds are entered against an Expense account.

To enter a new refund, click on the Add Refund button. The following screen will open to enter the refund details:
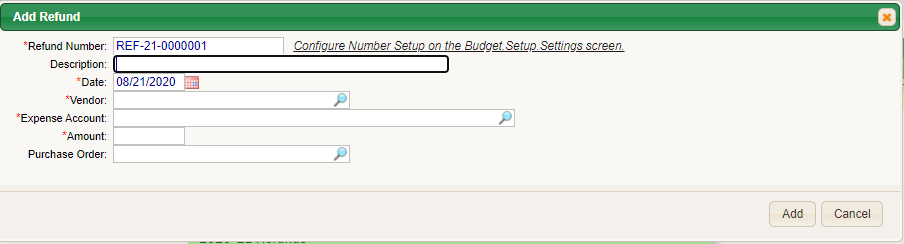
- Refund number - the system can be configured (follow link shown on screen) to create a starting number which will allow the system to automatically assign refund numbers for you. Or, you can manually assign your own number if you choose by typing that number in this field.
- Description - optional - you can enter a description of this refund.
- Date - enter the date of the refund in the MM/DD/YYYY format, or by clicking on the calendar icon and selecting the date from the calendar.
- Vendor - enter or select the vendor from whom the refund was received.
- Expense Account - enter or select the account number to which you wish to apply the refund.
- Amount - enter the amount of the refund.
- Purchase Order - if you would like reference a purchase order, enter the purchase order number here. NOTE - the PO will NOT be adjusted with this transaction.
Click Add.
This will create a refund entry on your Refunds > List screen. From this screen you can edit the refund, delete the refund or post it to the budget.
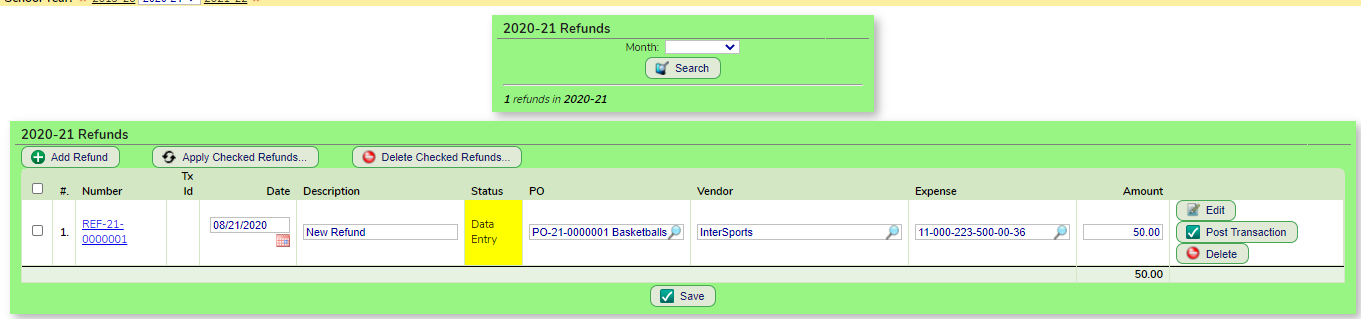
The refund is not posted to the budget until you click the Post Transaction button. If you have multiple refunds on this screen you also have the option of checking them all off and clicking the Apply Checked Receipts button. This will post all of them at once.
After the entry is posted, to see the account entries made by this transaction, you can click on the blue audit icon.
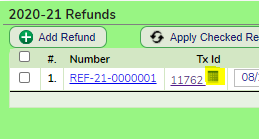
The Transaction Detail screen opens showing you all of the entries made by this expense refund.

Was this article helpful?
That’s Great!
Thank you for your feedback
Sorry! We couldn't be helpful
Thank you for your feedback
Feedback sent
We appreciate your effort and will try to fix the article