EMPLYOEE FORMS (if not already completed with Pre-Checklist)
Publishing/Staff Lists
- Once forms are in the new school year:
- Review the staff lists that are attached to the form.
- If the staff list has a Date of Hire or Contractual Start Date that determines who the form is being pushed out to you, you will need to make a copy of the staff list (so it does not affect the previous school years), enter the date hire/contractual start date on the employee form for the new school year and remove it from the staff list.

- Note:
- If your staff list does not have a date of hire or contractual start date but does have another date to pull staff, you will need to make a copy of the staff list and change the date to reflect who needs to be pulled for the next school year. This way you are not affecting any prior year’s data.
- If there is no date field on the staff list or on the Form Publishing screen of the Employee Form, there is nothing you must update.
“Do Not Publish Until”
- When the form is rolled over and already had a date entered from the year prior, the system will add 1 year to the date. Please review this date before moving onto the next form.
_________________________________________________________________________________
STATE REPORTING (NJSLEDS/SMID Report)
After the 6/30 Submission file is uploaded to the state:
- New Hires
- Ensure that all new hires who need to be reported for the next snapshot have the “Include in NJSLEDS” box checked on their Demographics screen.
- Staff who have left the district (After 6/30 Submission):
- Any staff members who left the district after the 6/30 submission (including those whose last day was 6/30) must be reported one final time as inactive. For these staff:
- Enter all appropriate end dates and exit codes
- Change their status to Inactive in the system.
- Enable “Include in NJSLEDS even if inactive” on their Demographics screen.
- Any staff members who left the district after the 6/30 submission (including those whose last day was 6/30) must be reported one final time as inactive. For these staff:
- Previously Reported Inactive Staff:
- For staff already reported as inactive in the 6/30 submission, uncheck both:
- “Include in NJSLEDS”, and
- “Include in NJSLEDS even if inactive” on their Demographics screen.
- For staff already reported as inactive in the 6/30 submission, uncheck both:
- The following screens must also be completed for each staff member who is new, exited or made changes in their position at the district:
- Employment History
- Job Roles
- Qualifications
- Years of Service
_________________________________________________________________________________
YEARS OF SERVICE (Running the Longevity Maintenance Task again)
- Depending on when your Longevity Maintenance task was last run and the settings that are enabled, the district may need to run it once more so that the staff are brought up to date when closing out the Years of Service record for the school year that just ended.
- Go to System – Tasks, search for “Longevity Maintenance”, click on the “Properties” button.
- There are checkboxes that will update specific pieces within the years of service tab for your staff.
- Here is the Longevity Maintenance Task article will break down each check box for you.

- It is recommended to first check all 4 of these boxes and then the “Run Now” button to update the staff (you can also leave them enabled all year so these fields update nightly).
- Here is the Longevity Maintenance Task article will break down each check box for you.
- When doing this before the Summer Rollover, make sure the “Apply/Remove Longevity Base Earnings in these School Years based on Longevity Rules:” runs for the school year you are rolling into (turn on the box for the field as well as the school year you are now rolled into), save and “Run Now”.
- This feature can also stay on for the year if you want the ACE to update throughout the year (when the staff qualifies for the next earnings) OR you can uncheck these boxes after you run the task, so it does not automatically update.
Locking Years of Service Records
- It is recommended to lock any previous Years of Service records after they have been reviewed. This adds an extra layer of security for the data.
- On the Personnel – Staff – Search Staff screen, use the search parameter “Longevity Categories” to select the categories you want to lock. Select one at a time and run a search.

- Leave the results on this screen and toggle to the Personnel – Mass Change screen.
- Leave the “Simulation Mode” box enabled
- Leave the “Staff List” with the “(Results from Personnel.StaffSearch)” selected.
- Select the “School Year” (year you rolled over from)
- Select the “Longevity Category” you searched for on the Personnel.StaffSearch screen
- Select the “Checked” Option
- Press “Simulate or Apply Changes”
- Review the data for accuracy. When you are ready to make these changes live, uncheck the “Simulation Mode” box and press the “Simulate or Apply Changes” again.
- Repeat these steps for each Longevity Category.
_________________________________________________________________________________
STAFF EIS EVAL SCREEN
- Update Tenure Status and Eval Category
- On the staff EIS Eval screen you can update the Tenure Status if applicable.
- In SchoolFi go to Personnel – Staff – Search Staff, click on the “Properties” button of the staff member. Toggle to their EIS Eval tab. Here you can select their status from the drop down. Then “Save and Recalculate” at the bottom of the notecard.
- On the staff EIS Eval screen you can update the Tenure Status if applicable.

- If you have staff that have switched positions and will be scored under a different evaluation category, you will need to update on their EIS Eval record.
- In SchoolFi go to Personnel – Staff – Search Staff, click on the “Properties” button of the staff member. Toggle to their EIS Eval tab. Here you can select their category in the drop down. Then “Save and Recalculate” at the bottom of the notecard.

- Adding New Staff
- All new staff who are being evaluated will need an EIS Eval record created with their,
- Evaluation Category
- Tenure Status
- EIS Eval Score Type
- Check if they are MSGP or Administrator SGP Status
- All new staff who are being evaluated will need an EIS Eval record created with their,
*NOTE: All EIS Eval screen updates should be made before mass creating and assigning observations for the new school year.
_________________________________________________________________________________
EVALUATION SETTINGS
Changes to Setup
- This is the time to make any adjustments to the following components:
- Rubrics
- Evaluator Lists/Visibility
- Workflows
- Conference Forms (Pre, Post, Observation Narratives)
- PDF Forms (Observation Reports & Summative Reports)
- Eval. Templates
- EIS Scoring
*NOTE: Once evaluations are pushed out to staff it is not recommended to make any further changes. If there are any questions about set up or changes, please enter a ticket to the Freshdesk Helpdesk.
Creating Observation Periods (If district uses this feature)
- During the Summer Rollover process, the Evaluation Cycles/Observation Periods were rolled over to the new school year with 1 year added (e.g. 7/1/25 will become 7/1/26).
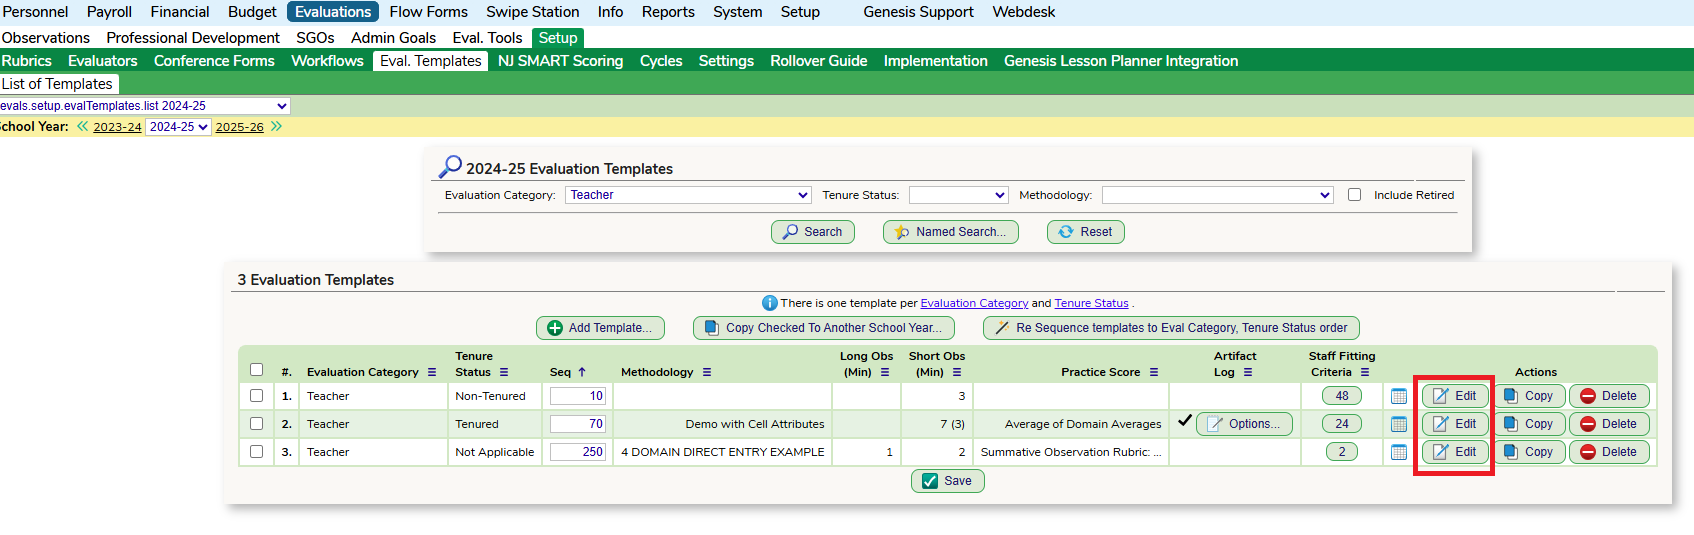
- Go to the Evaluations – Setup – Cycles screen to review if these dates need adjustments.
- Select “Edit” to be able to change the date(s).
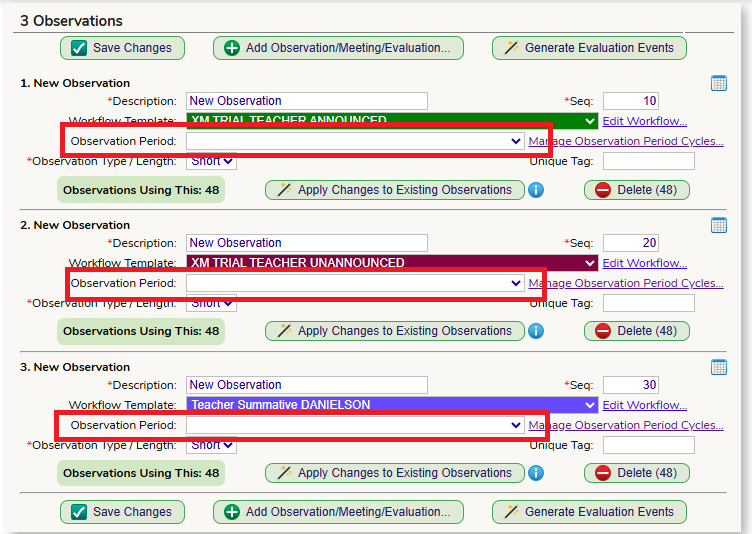
- Once cycles are reviewed, toggle to the Evaluation – Setup – Eval. Templates for the new school year, select “Edit” and update the Observation Periods to the new dates.
Create Observation Records
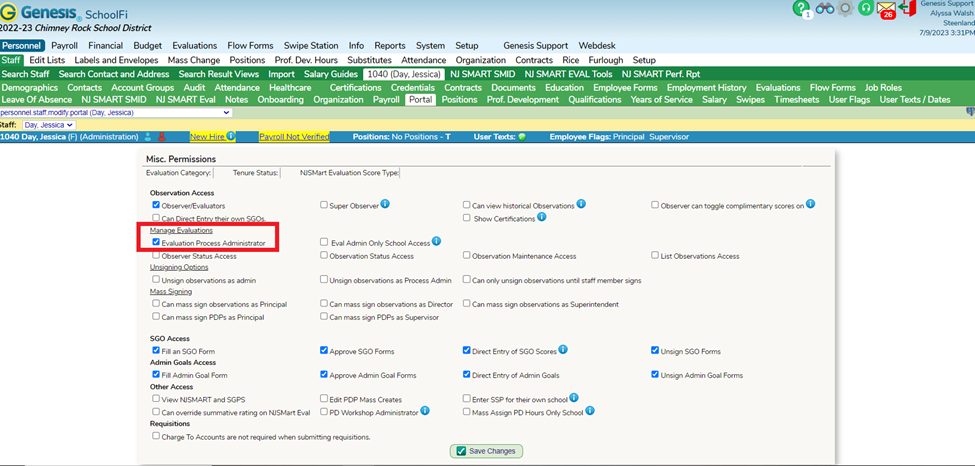
- You must have the “Evaluation Process Administrator” enabled in your Portal screen to mass create observation in your employee portal.
- Log into your Employee Portal and navigate to the Evaluations – Manage – Observation Maintenance screen. You can either search for your entire district or use the search criteria to group your staff. Highlight their records and click on the “Create Observations Records” button.
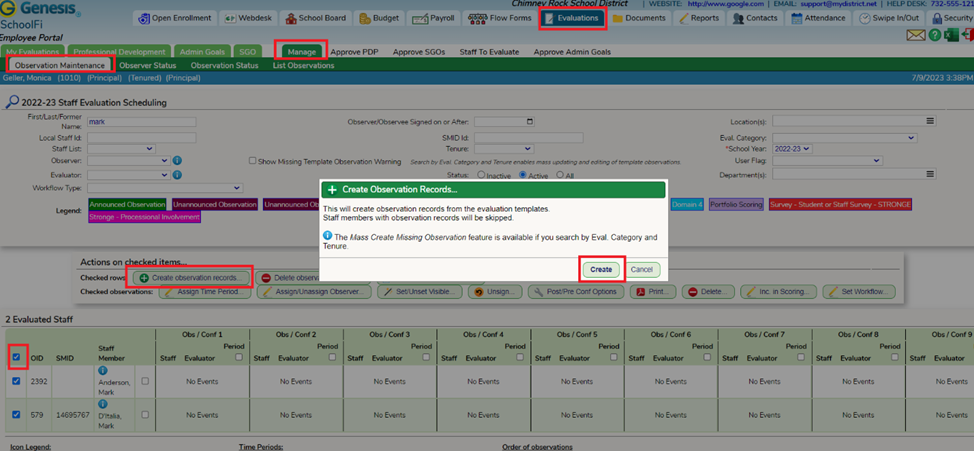
*NOTE: When mass creating the observations for the year, the system is looking at the staff EIS Eval record, specifically Eval Category and Tenure Status, and matches it to the corresponding Eval. Template.
Assigning Observations
*NOTE: If your district allows the observers to assign themselves to their observations you can skip this step.
- In your Employee Portal - Evaluations - Manage - Observation Maintenance, use the search engine to select the first group of staff members your observer will be assigned too and run a search.

- Check off the corresponding box(es) for each observation this observer will be conducting.

- Select the “Assign Tools” button.
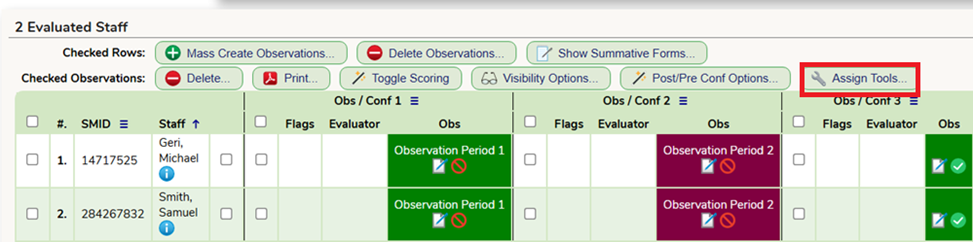
- In the popup click on “Assign Observer” bubble.

- On the next popup, in the first dropdown, select the observers’ name.
- The priority for all staff should be set to “Primary”.
- Districts discretion to turn on the “Email Evaluator/Email Staff” boxes.
- Click Assign.

Was this article helpful?
That’s Great!
Thank you for your feedback
Sorry! We couldn't be helpful
Thank you for your feedback
Feedback sent
We appreciate your effort and will try to fix the article